The Deadline Is Real, and It's Closer Than You Think
On October 9, 2026, Cloudflare announced it was acquiring Deno, the JavaScript and TypeScript runtime created by Node.js founder Ryan Dahl. The announcement topped Hacker News within hours, but the part that matters most for developers running production workloads is buried in the timeline:
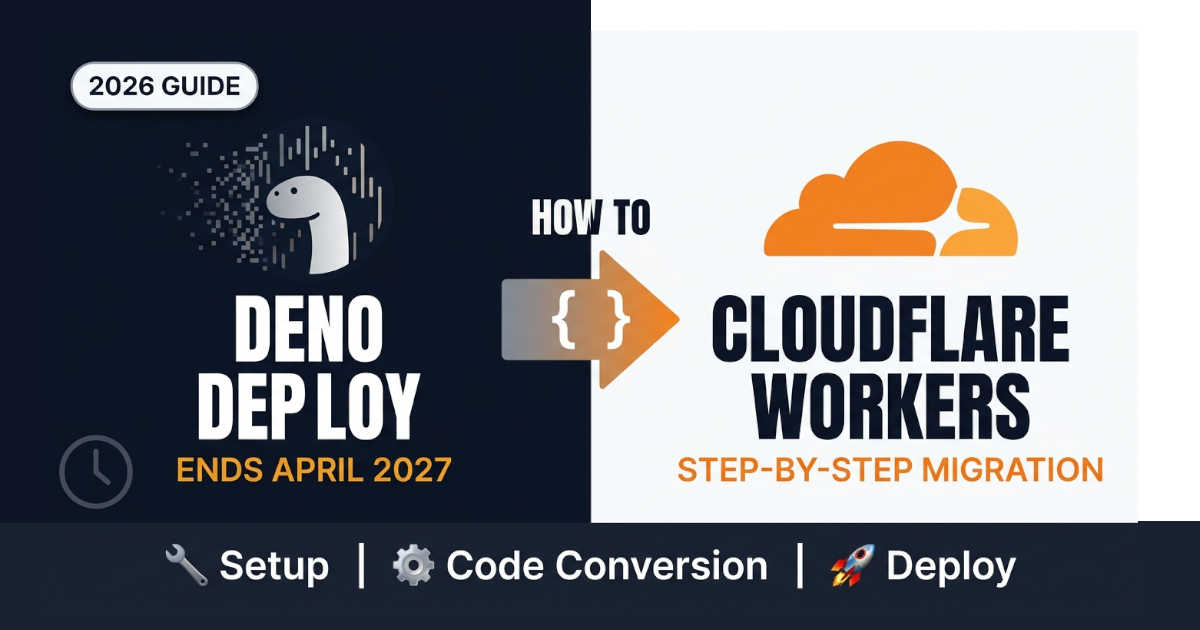
Deno Deploy shuts down in approximately six months, around April 2027.
If you have anything running on Deno Deploy, the clock is already ticking. This guide walks through the migration path from Deno Deploy to Cloudflare Workers, covering what maps cleanly, what requires redesign, and the decisions you need to make before you move a single line of code.
Learn OpenCode vs Claude Code
Why This Migration Exists
The acquisition isn't really about the Deno runtime. Cloudflare's interest centers on celld, a project Dahl shipped in August 2026 that lets developers run Cloudflare's Workers and Durable Objects programming model on their own infrastructure. The goal is to merge celld with workerd (Cloudflare's open-source Workers runtime) so that self-hosting Workers becomes a first-class option.
For Deno Deploy users, the practical outcome is straightforward: your hosting platform is going away, and Cloudflare Workers is the designated migration target. Paying customers receive migration assistance, but the technical work is on you.
Read article on Cloudflare Python Workers in 2026
What You Need to Know Before You Start
Prerequisites
Before beginning migration, ensure you have:
Node.js 18+ or Deno installed , You'll need one of these to run Wrangler, Cloudflare's CLI
A Cloudflare account , Free tier works for testing; production may require a paid plan
Your Deno Deploy project source code , Ideally with your
deno.jsonand any deployment configurationA list of your Deno Deploy primitives , Specifically:
Deno.serve,Deno KV,Deno.cron, and any npm dependencies
The Core API Translation Map
Here's how Deno Deploy primitives map to Cloudflare Workers:
Deno Deploy | Cloudflare Workers | Notes |
|---|---|---|
|
| Event-driven, no long-lived server |
| Workers KV | Eventually consistent, optimized for reads |
| Durable Object storage | Strong consistency, single-writer |
| Cron Trigger in | Configured declaratively, not in code |
Static files |
| Wrangler serves static assets directly |
npm packages | Mostly work via | Enabled by default for compat dates ≥ 2026-08-04 |
The skeleton migration , converting Deno.serve to a Workers fetch handler , is nearly mechanical. The design decisions happen around state management and configuration.
Read article on Choose Between FastAPI and Express.js in 2026
Step-by-Step Migration
Step 1: Set Up Wrangler from Deno (Optional)
If you want to keep using Deno for local development while deploying to Workers, you can run Wrangler via Deno. This is useful during migration because you don't need to install Node.js.
bash
deno add npm:wranglerCreate a wrangler.json file manually. Don't use wrangler init , it generates files tailored to Node.js that you won't need:
json
{
  "$schema": "https://www.unpkg.com/wrangler/config-schema.json",
  "name": "my-migrated-worker",
  "main": "src/mod.ts",
  "compatibility_date": "2026-04-18",
  "observability": {
    "enabled": true
  }
}
Add tasks to your deno.json:
json
{
  "tasks": {
    "deploy": "deno --allow-env --allow-run npm:wrangler deploy",
    "dev": "deno npm:wrangler dev",
    "cf-typegen": "deno npm:wrangler types"
  }
}
Run the type generation to get Workers runtime types:
bash
deno task cf-typegenThis creates worker-configuration.d.ts with the Env interface and all Workers runtime types.
Step 2: Configure Type Checking
Deno ships with its own Web API globals, which conflict with Workers runtime types. You need to tell Deno to use the Workers types as the source of truth.
Add to your deno.json:
json
{
  "compilerOptions": {
    "lib": ["esnext"],
    "types": ["./worker-configuration.d.ts"],
    "skipLibCheck": true
  }
}
"lib": ["esnext"]removes Deno's default Web/DOM globals"types": ["./worker-configuration.d.ts"]loads Workers types project-wide"skipLibCheck": trueskips type checking inside the generated declaration file
Step 3: Convert Your Server Code
This is the core migration. Here's a before-and-after:
Deno Deploy (before):
typescript
Deno.serve((req) => {
  const url = new URL(req.url);
  if (url.pathname === "/api/hello") {
    return Response.json({ message: "hello" });
  }
  return new Response("not found", { status: 404 });
});
Cloudflare Workers (after):
typescript
export default {
  async fetch(request, env, ctx) {
    const url = new URL(request.url);
    if (url.pathname === "/api/hello") {
      return Response.json({ message: "hello" });
    }
    return new Response("not found", { status: 404 });
  },
} satisfies ExportedHandler<Env>;
The handler logic is identical. The wrapper changes from Deno.serve() to an exported object with a fetch method.
Step 4: Set Up the Build System
Wrangler's built-in build system uses esbuild configured for Node.js, which doesn't work with Deno's module resolution. You need a custom build step.
Install esbuild and Deno's esbuild plugin:
bash
deno add npm:esbuild jsr:@deno/esbuild-pluginCreate build.ts:
typescript
import * as esbuild from "esbuild";
import { denoPlugin } from "@deno/esbuild-plugin";

await esbuild.build({
  entryPoints: ["src/mod.ts"],
  outfile: "dist/server.js",
  format: "esm",
  bundle: true,
  minify: true,
  treeShaking: true,
  plugins: [denoPlugin()],
});

await esbuild.stop();
Add a build task to deno.json:
json
{
  "tasks": {
    "build": "deno run --allow-read --allow-write --allow-net --allow-env build.ts"
  }
}
Update your wrangler.json to point to the built output:
json
{
  "name": "my-migrated-worker",
  "main": "dist/server.js",
  "compatibility_date": "2026-04-18"
}
Step 5: Handle State , The Critical Decision
This is where migrations get complicated. Deno KV and Workers KV are not equivalent.
Deno KV offers transactional writes with strong consistency. You can read-modify-write atomically.
Workers KV is eventually consistent and optimized for read-heavy workloads. Writes propagate globally over up to 60 seconds. There are no transactions.
You have two options:
Option A: Simple migration to Workers KV
Use this when your KV usage is read-mostly and doesn't require atomic operations.
typescript
// Deno Deploy
const kv = await Deno.openKv();
const value = await kv.get(["user", userId]);

// Cloudflare Workers
const value = await env.MY_KV_NAMESPACE.get(`user:${userId}`);
Add the KV binding to wrangler.json:
json
{
  "kv_namespaces": [
    {
      "binding": "MY_KV_NAMESPACE",
      "id": "your-namespace-id"
    }
  ]
}
Option B: Durable Objects for transactional state
If your Deno KV code does read-modify-write cycles or relies on transactions, you need Durable Objects.
Durable Objects give you a single-threaded execution environment with its own SQLite database , essentially a small, addressable server that you can shard by key.
typescript
export class Counter {
  state: DurableObjectState;
  sql: SqlStorage;

  constructor(state: DurableObjectState, env: Env) {
    this.state = state;
    this.sql = state.storage.sql;
  }

  async increment() {
    const result = this.sql.exec(
      "UPDATE counters SET value = value + 1 WHERE id = 'main' RETURNING value"
    ).one();
    return result.value;
  }
}
Register the Durable Object in wrangler.json:
json
{
  "durable_objects": {
    "bindings": [
      {
        "name": "COUNTER",
        "class_name": "Counter"
      }
    ]
  }
}
This is the harder path. Durable Objects require Workers using ES modules format, and they change your architecture from stateless request-response to stateful, addressable objects. Plan accordingly.
Step 6: Migrate Cron Jobs
Deno Deploy's Deno.cron() becomes a Cron Trigger in wrangler.json with a scheduled() handler.
Deno Deploy (before):
typescript
Deno.cron("daily-report", "0 0 * * *", async () => {
  await generateDailyReport();
});
Cloudflare Workers (after):
json
{
  "triggers": {
    "crons": ["0 0 * * *"]
  }
}
typescript
export default {
  async scheduled(event, env, ctx) {
    await generateDailyReport();
  },
} satisfies ExportedHandler<Env>;
Step 7: Static Files
If you served static files from Deno Deploy, move them into an assets directory and configure it in wrangler.json:
json
{
  "assets": {
    "directory": "./public"
  }
}
Wrangler serves static assets directly, falling through to your Worker only for non-matching routes. If you need your Worker to run before static assets (for authentication, for example), set assets.run_worker_first: true.
Step 8: Migrate Environment Variables
Workers access environment variables through the env parameter, not global scope.
Deno Deploy (before):
typescript
const apiKey = Deno.env.get("API_KEY");Cloudflare Workers (after):
typescript
export default {
  async fetch(request, env) {
    const apiKey = env.API_KEY;
    // ...
  },
} satisfies ExportedHandler<Env>;
Define them in wrangler.json as vars (non-secret) or use wrangler secret put for sensitive values.
Step 9: Deploy and Verify
Build and deploy:
bash
deno task build
deno task deploy
Test your deployment:
bash
curl https://your-worker.your-subdomain.workers.dev/api/helloCheck the Cloudflare dashboard to verify logs and observability.
10 High-Impact Projects for Aspiring Developers
What Doesn't Map Cleanly
Be aware of these gaps before committing to migration:
Memory limits. Workers have a 128MB memory limit per isolate. Deno Deploy allowed more. If your code loads large datasets into memory, you'll need to restructure.
No long-lived process. Workers are event-driven. There's no server to start, no persistent in-memory state between requests. Top-level variables reset between invocations. If you cached data in module scope on Deno Deploy, move it to KV or Durable Objects.
Cold starts are different. Workers cold starts are generally faster (under 1ms claimed), but the execution model shift means you can't rely on warm process state.
Configuration moves to wrangler.json. Deno's deno.json doesn't apply. Everything , bindings, cron triggers, assets, compatibility flags , lives in Wrangler config.
Best Practices for a Smooth Migration
Audit your primitives first. Before writing any code, list every Deno Deploy feature you use:
Deno.serve,Deno.KV,Deno.cron, environment variables, static files. Map each to its Workers equivalent.Start with a single function. Migrate one endpoint or one simple Worker first. Get the build pipeline working. Then expand.
Decide KV vs. Durable Objects early. This is the architectural fork. If your state is read-mostly, KV works. If you need transactions or consistency, Durable Objects are mandatory. Don't discover this halfway through.
Test type checking before deployment. The
compilerOptionsconfiguration in Deno prevents conflicts between Deno's Web globals and Workers runtime types. Rundeno checkto catch issues early.Use compatibility dates. Workers behaviors change with compatibility dates. Set a recent date (2026-08-04 or later) to get Node.js compatibility enabled by default.
Monitor after migration. Workers observability is different from Deno Deploy. Enable it in
wrangler.jsonand watch for cold start patterns, memory errors, or KV consistency issues.
Alternatives to Consider
If Cloudflare Workers doesn't fit your needs, evaluate these options:
Keep using Deno (self-hosted). Deno remains open source. You can run it on your own servers, a VPS, or a container platform. You lose the managed edge network but keep the runtime. Development stops in October 2027, but security patches continue through then.
Node.js + Express/Fastify on a VPS. The most traditional path. Full control, no vendor constraints, but you manage everything: scaling, TLS, deployments, monitoring.
Bun. A faster JavaScript runtime with Node.js compatibility. It's not a direct Deno Deploy replacement, but it's an alternative runtime if you're evaluating your stack anyway.
Fly.io, Railway, or Render. These platforms support Deno and Node.js deployments with container-based infrastructure. Less edge-oriented than Workers, but more flexible for long-running processes.
FAQ
How long do I have to migrate?
Deno Deploy shuts down around April 2027 , approximately six months from the October 2026 announcement. Paying customers receive migration assistance.
Will Deno the runtime disappear?
No. Deno remains open source. The team will provide monthly bug fixes and security updates for one year (through October 2027), then end development. The community can continue it.
Does Workers KV support transactions?
No. Workers KV is eventually consistent with no transactional guarantees. If you need transactions, use Durable Object storage.
Can I use npm packages in Workers?
Mostly yes. Workers enable Node.js compatibility (nodejs_compat) by default for compatibility dates of 2026-08-04 or later. Packages that depend on native binaries may not work.
Is JSR affected?
No. JSR continues operating, with its infrastructure moving to Cloudflare.
What happens to my Deno Deploy custom domain?
Cloudflare's migration guide covers account setup, environment variables, and custom domain transfers for paying customers.
Conclusion: Start Now, Not in March
Six months sounds like plenty of time until you account for production traffic, a day job, and competing priorities. The migration itself is straightforward for simple apps, but state management and architectural decisions around Durable Objects can add weeks if you defer them.
Your next steps:
Inventory your Deno Deploy workloads , List every endpoint, cron job, KV usage, and environment variable.
Classify your state , Simple reads go to Workers KV. Transactions go to Durable Objects.
Set up Wrangler with Deno , Get the build pipeline working on a test project.
Migrate one function , Prove the pattern end-to-end before scaling up.
Test in production , Deploy to a staging Worker, run traffic, verify behavior.
The Workers platform is a capable target. The API overlap is real. But the execution model is different enough that migration is a project, not a find-and-replace. Start the audit this week, and the April deadline won't sneak up on you.